 Legoaizer -
Help Legoaizer -
Help |
 Legoaizer -
Help
Tutorial for Picture Mosaic
Legoaizer has the possibility to use real brick or plate pictures of
brick parts, instead of computer generated bricks. This option has some use restrictions: some features
are not needed or cannot be used when using pictures. The mosaic creation is
fundamentally different from the computer generated approach. It used the
well-known and highly effective Mosaizer XV© mosaic creation engine. This
engine has proven to be a high-end mosaic creation tool, much acclaimed and
rewarded, and used on websites and in commercial projects to create high quality
mosaics. The secret is the way how the mosaic 'tile' is selected: it uses the
colour pattern in the picture library. This library of pictures is what you need
to select and create, before continuing to make a mosaic in bricks. Some
features with real brick pictures which are not possible
when using computer generated bricks:
Pre-amble: use the pre-installed picture library
The Legoaizer application has a
pre-installed picture library. The name of this library is 'RealBrickPictures'
and can be loaded via the usual way from the main menu: 'Colour table' 'Open table' and the select this
table. This table has a 11 basic brick shapes for 17 commonly used colours. In total 177
brick pictures are provided. After the table has been activated you can simply
create a new mosaic. To actually use pictures you also need to activate the
'Use pictures for layout' option in the 'Colour matching' pop-up window. Below you find a
close-up of such a real picture mosaic. Here the full version can be seen. Lesson 1: My first brick
pictures The applications need a library
of pictures to make a photo-realistic brick mosaic. Here the free formatted
pictures are explained. In the tutorial
for Bricklink the Bricklink-formatted library creation is explained. To
make such
a (free format) library you need to prepare a couple of things:

An example of a series of round bricks is show in the picture below.

Put all the bricks in a new folder on your hard drive. To avoid bland results make sure you have sufficient bricks to start with. Although there is no limit to the amount of bricks, it is strongly recommended to use dedicated folders for your colour sets. A large number of bricks can slow down the Builder and the colour editors dramatically, so make your choice before you continue.
Lesson 2: My first photo-realistic
brick library
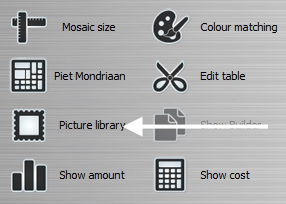
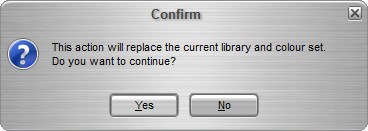
After you are done with creating these 60x60 pixels (or multiples thereof) pictures, it's now time to offer these to the application. First press the 'Picture library' button (left picture below). A confirmation screen is opened (right picture below). Press 'Yes' if you are ready to replace the existing library.
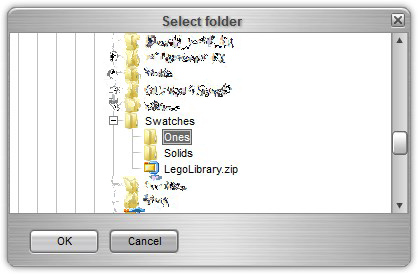
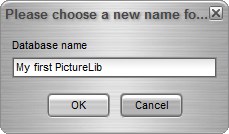
The next pop-up windows will ask you to select the folder in which your pictures are located (left picture below). Finally you are requested to provide a name for this library. After this last step has been taken the library is created, and you can now see the average colours of each picture in the folder.
As you can see in the screenshot below the names have been truncated by the '_' sign in the name, and the colour name is clearly reflected by the average colour of each picture. If all is done successfully, you don't need to do this a next time when you like to start with another photo-database. The saved database is automatically loaded when you start the application, ready for next use. More about saving is found in the 'Import and export' section.
Lesson 3: My first photo-realistic brick mosaic
You need to check both options: 'Apply' the Mosaizer XV engine, and 'Pictures in blueprint'. You can leave both options unchecked, but the potential of the library is then discarded, and only the average colours (as indicated by the colour in the main window) are used, like any other 'normal' mosaic creation with computer generated bricks.
Now you can press the 'Create mosaic' button and wait for the result. Mosaic creation this way takes (much) more time. It has to analyze each possible picture, match with the source colour request and then put the best fit picture in the photo-realistic mosaic bitmap.
Lesson 4: Selecting the colours
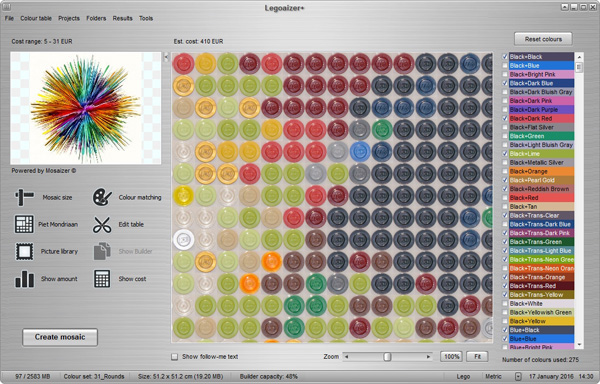
As with normal mosaic creation you can select and deselect any colour from the colour tables. An example of this is shown below, where the middle section of colours has been deselected (left). It's a matter of taste, but from a distance the mosaics seems pretty equal, although the left mosaic clearly lacks a couple of colours, yet it is less detailed. For example: compare the left red parts, it lacks details in yellow and orange.

Epilogue: What else is there to do?
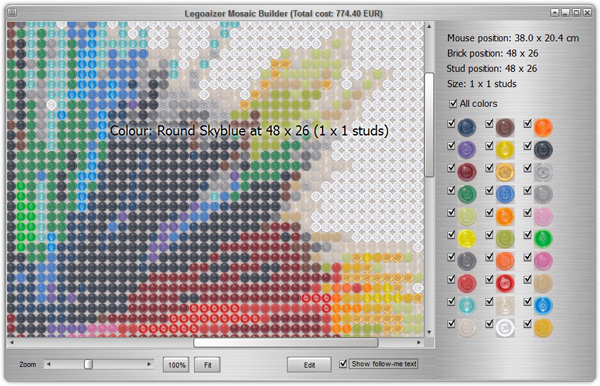
Otherwise, read the tips and suggestion in the 'normal' tutorial. From this moment on the differences of using a picture library and computer generated bricks are almost none.